안녕하세요
오늘은 git에 대해 설명드리겠습니다.
실행 방법
1.gitproject- git 폴더 생성 및 이동
2.git init : git 시작

사진 설명을 입력하세요.
open .git :깃 폴더 열기
rm -rf .git :깃 삭제
기본 편집 방법
git --version : git 버전 확인
git config --list : 내 계정 확인
git config --global -e :
code . : vscode에서 편집 가능
get config --global core.editor "code"
☆☆☆ 메일 지정☆☆☆
git config user.name "daegeunbae"
git config user.email "antoniobae12@gmail.com"
git config user.name : 확인
git config user.email : 확인
git config --global core.editor
* git 공식 사이트에서 모든 명령어 확인 가능
git status :git 상태 확인
단축키 설정
git config --global alias.st status
사진 설명을 입력하세요.
workflow 는 크게 3가지
1)working directory
2)staging area
3)git directory
3.project 실행
echo hello world! > a.txt
echo hello world! > b.txt
echo hello world! > c.txt
사진 설명을 입력하세요.
4.staging area로 옮기기
git add a.txt
사진 설명을 입력하세요.
git add *.txt : 모든 파일 옮기기(커밋할 준비 완료)
git rm --cached * : 모든 파일 스테이징에서 제거 (working directory로 이동)
git add : directory에 있는 모든 파일 스테이징 area로 이동됨
git add . : directory에 있는 모든 파일 스테이징 area로 이동됨(삭제된 파일 포함)
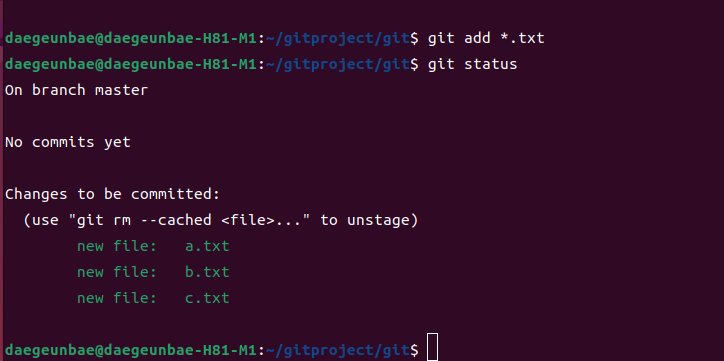
사진 설명을 입력하세요.
5.내용 추가하기
echo add >> c.txt : c do add 추가
git diff : 차이 확인하기
cat c.txt
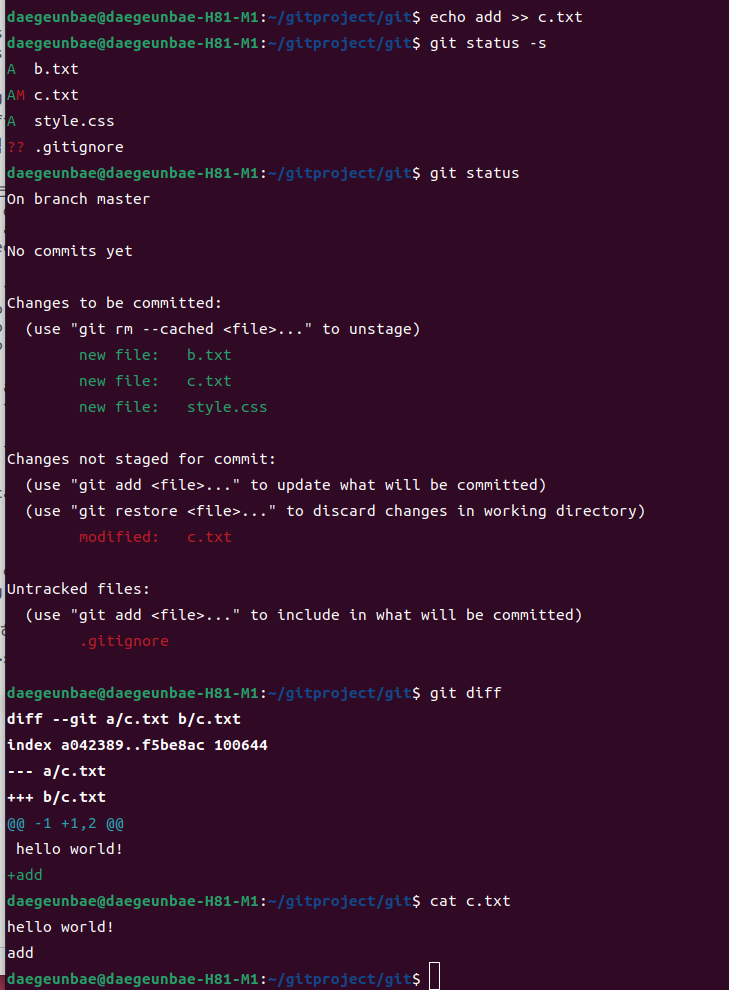
사진 설명을 입력하세요.
git diff --staged :stage area 에 있는 목록 확인
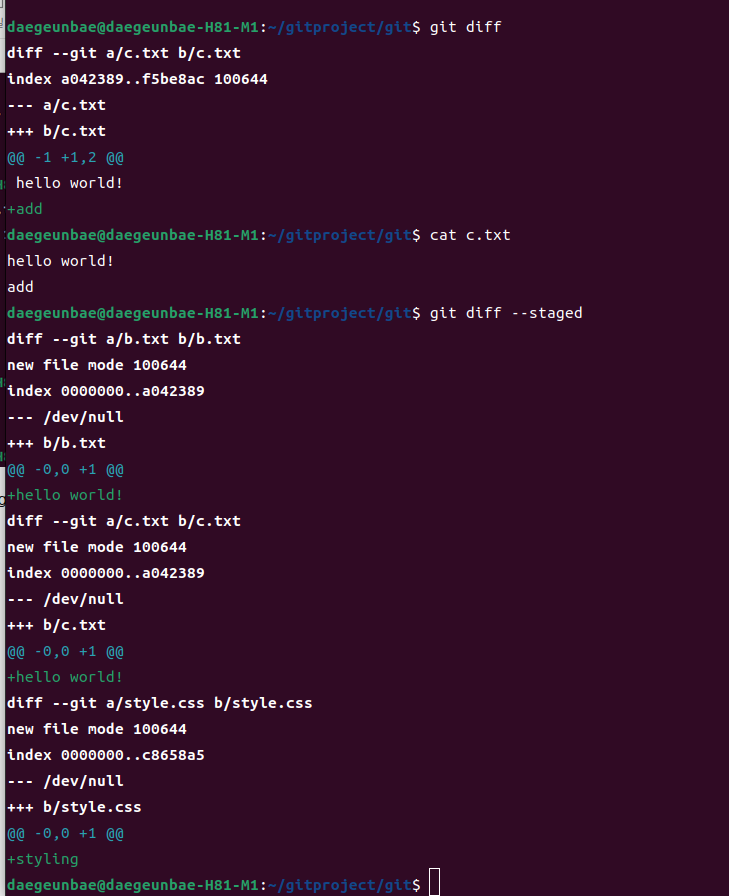
사진 설명을 입력하세요.
git config --global -e :vscode에서 수정
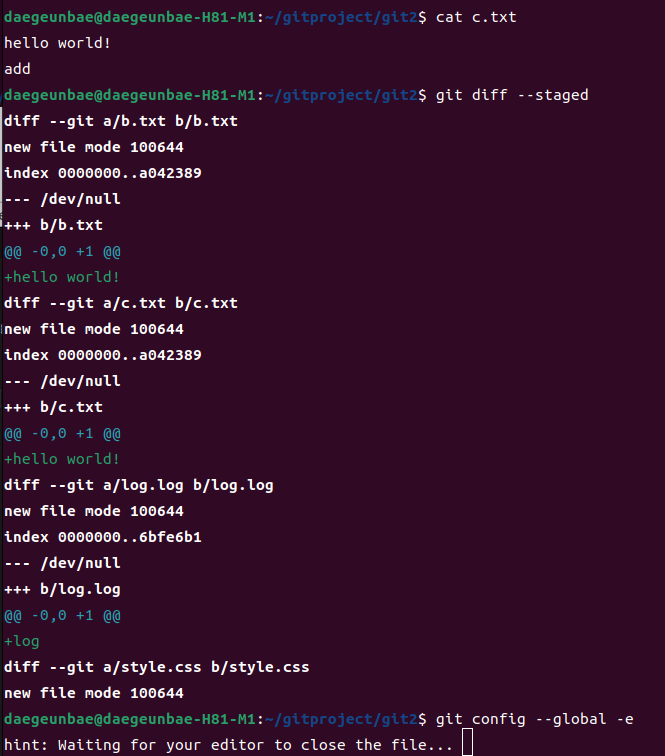
사진 설명을 입력하세요.
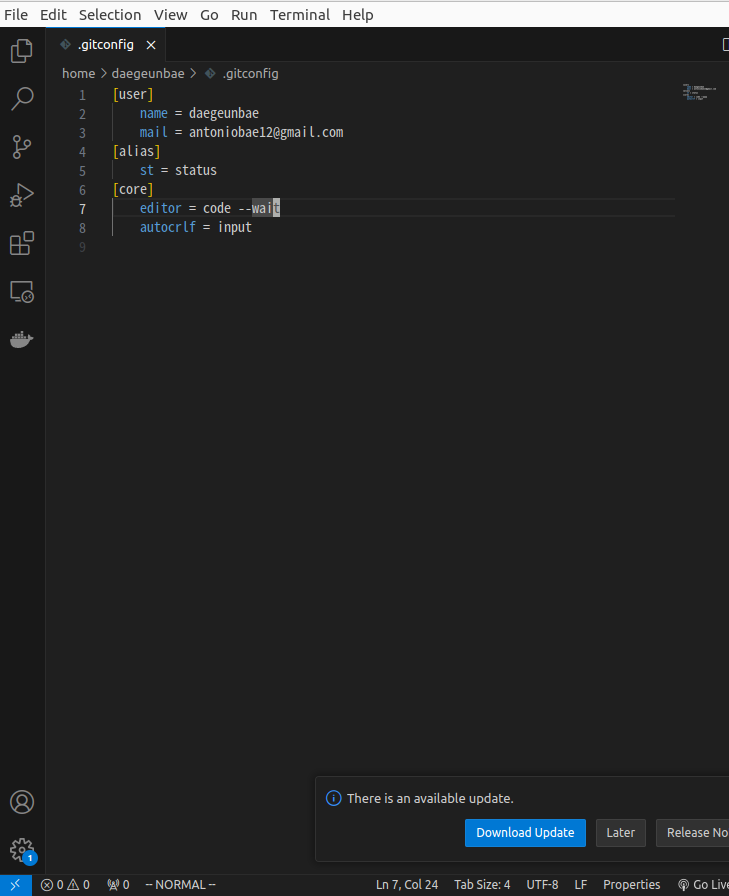
사진 설명을 입력하세요.
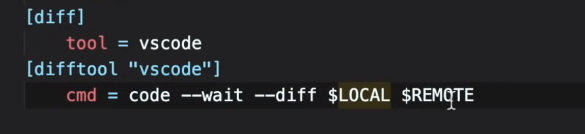
사진 설명을 입력하세요.
6.working directory에 있는 내용 확인 방법
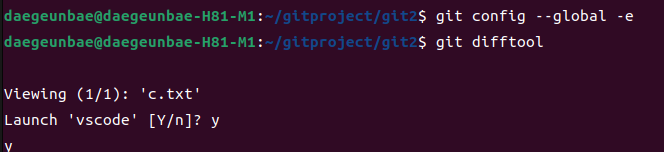
사진 설명을 입력하세요.
이 화면이 나오면 working directory에 add가 추가된 모습니다.
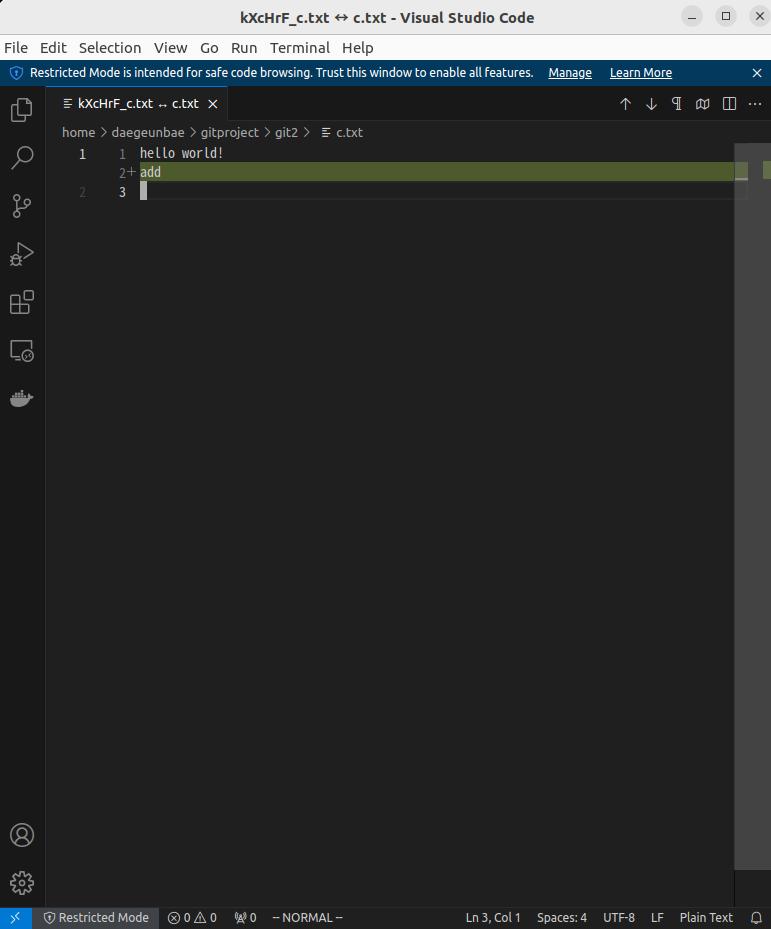
사진 설명을 입력하세요.
다음으로 staging area에 있는 내용 확인 방법
vscode를 끄고 다음과 같이 입력해줍니다.
git difftool --staged
사진 설명을 입력하세요.
저장한 후, vscode를 종료하면 staging area에 있는 내용 확인 가능합니다.
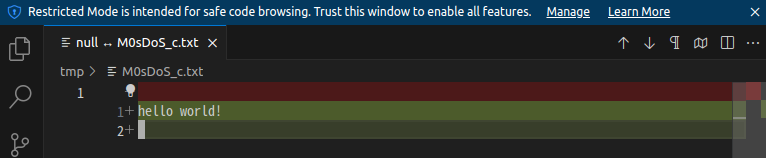
사진 설명을 입력하세요.
7.commit
이제 커밋을 하는 명령어입니다.
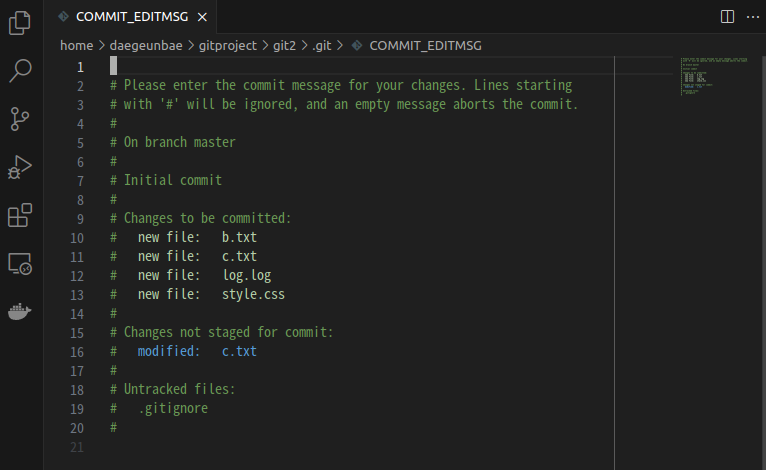
사진 설명을 입력하세요.
vscode가 열리면 다음 내용을 추가해줍니다.
Title

Description
사진 설명을 입력하세요.
저장해서 끄고 git log 입력해보시면 추가된 것을 확인하실 수 있습니다.
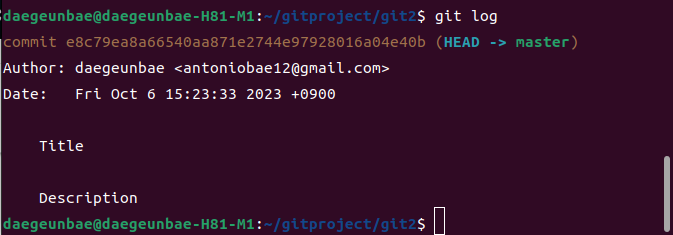
사진 설명을 입력하세요.
☆☆☆add 없이 바로 수정한 내역들을 메시지와 함께 커밋하는 방법 ☆☆☆
git commit -am "third commit"
사진 설명을 입력하세요.
감사합니다.
'Git' 카테고리의 다른 글
| Streamlit Github pages 만들어 배포하는 방법 (0) | 2024.03.24 |
|---|
